You may have noticed this little easter egg in the CLEAN theme. Here is how to use it!
Before we jump into the tutorial it's important to mention that you'll want to use this cool little feature sparingly. The pulsing circle is great to draw visual attention to a section of your web page because it's so eye-catching. However, if you put it everyone it won't have the same effect it's intended for.
Let's get into it.
Step 1. Select the color you want to use
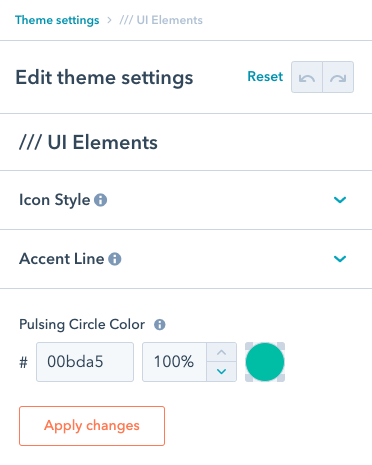
While editing any of your web pages click the DESIGN tab and then jump into the theme settings editor. From there, go into the /// UI Elements section.
This is what you're looking for.

Set the color of your choice and then publish these changes. As a pro-tip, I'd keep the opacity set to 100% for the best effect.
Step 2. Locate the spot you want to add it.
The pulsing circle really works best when adding it to the beginning of a headline so we'll start there. In this example, we'll use the pulsing circle that's on my home page to call out the CLEAN 100% Happiness Guarantee.
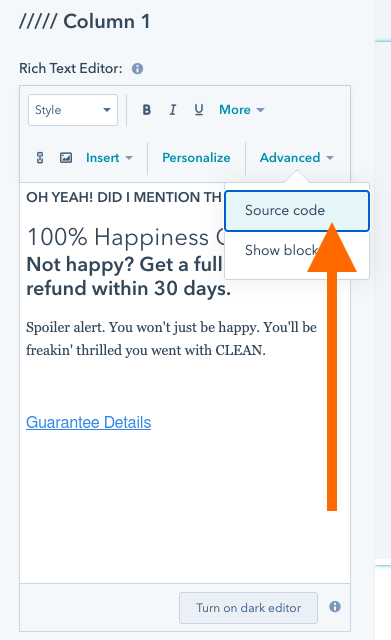
Navigate to the rich text editor where you want to add it. Then click the Advanced dropdown and Source Code.

This will bring up the code editor for the content in the rich text module that will look something like this.

That's pretty small and if you wear glasses like me it's probably a bit hard to read.

Let's try this instead.
Any better? Kinda but let's carry on.
The important part of that code block is all in this section.
<h2 style="position: relative; display: initial;">
  <span class="pulsating-circle"></span>
   100% Happiness Guarantee
 </h2>
Here is the important code that you'll need to add to the element you want the pulsating circle on. First, you want to add this inside the opening tag (ie. <h2> )
style="position: relative; display: initial;"
Next, you need to add the HTML to trigger the pulsing circle. This bit.
<span class="pulsating-circle"></span>
And that's it! You're done! Just hit Save changes and watch that puppy pulse away!
Want to add it to a CTA button? No problem-o.
You're going to follow this exact same approach with a few additions. Notice in the code dark code block up above the CTA code looks like this.
Yours may be wrapped in a <p> or nothing at all. You'll want to wrap it in a <div> just like the example above. Then apply the same technique.
<div style="position: relative; display: initial;">
<span class="pulsating-circle" style="z-index: 10; top: -15px;"> </span>
</div>
However, this time there is one main addition. Notice on the <span> and how it now includes this code within it.
style="z-index: 10; top: -15px;"
That is important. Depending upon how tall your CTAs are you may need to adjust the top position. In my example -15px puts it in the top left corner.
Congrats! You're now a coder.


