This article will help you set up or troubleshoot the breadcrumb module if you happen to be using it.
Before we jump in there are a couple of key things to know about the breadcrumb module.
- This module requires setting up an Advanced Menu in HubSpot.
- This module will not simply show the entire click path of someone browsing through your entire website.
Setting up the Advanced Menu
You have two options here:
- You can use the same Advanced Menu that you set up for your main navigation in the global header.
- You can set up a separate Advanced Menu specifically for the breadcrumb.
Either of these will work just fine. In this example, we're going to go for option 2 for the sake of ease and clarity.
In your Content Settings under Website, select Navigation in the sidebar. Then use the dropdown to +Add Menu.
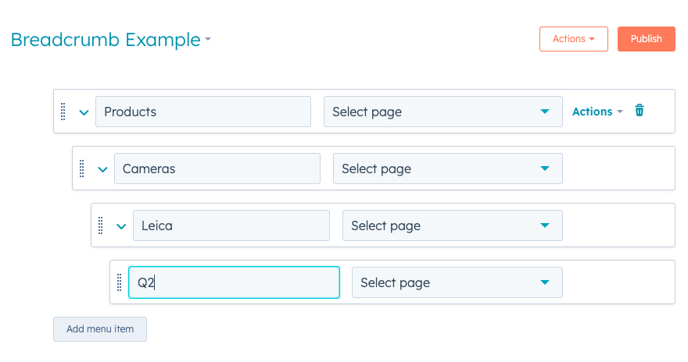
Let's pretend we want a breadcrumb that looks like this...
Products > Cameras > Leica > Q2
What we will need to do is create a NESTED navigation structure using the Advanced Menu and setting up child items the further we go down the breadcrumb's path.
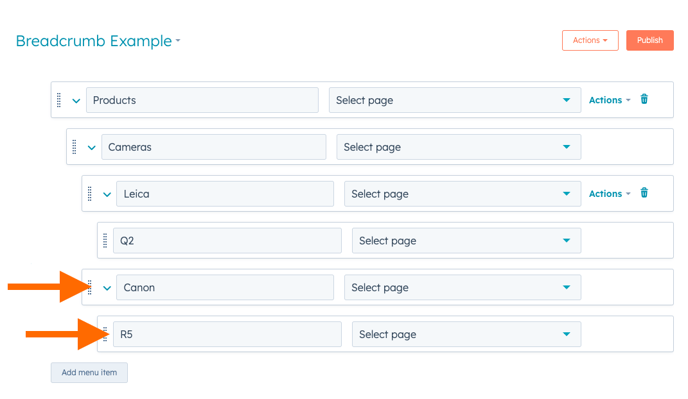
 Because the breadcrumb will need to work with a variety of paths, you'd just add those in accordingly.
Let's say we want the breadcrumb to do this:
Products > Cameras > Canon > EOS R5
We'd simply want the Menu to include these items at the appropriate nested level.

Super Important:
Next, you'll want to make sure that each of these is associated with a PUBLISHED page. If it is associated with a page that is currently in DRAFT mode, the breadcrumb path will break and nothing will be visible.
Setting up the Breadcrumb Module
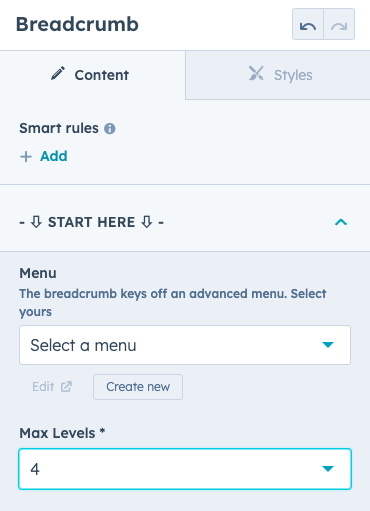
Now that your Advanced Menu is ready to rock-n-roll, go ahead and add the Breadcrumb module to any page. Under the Start Here section be sure to select the Advanced Menu and set how many levels deep the breadcrumb path can travel.

Waalaa! You've officially set up your breadcrumb.
