If your font isn't included in the Google Font library, here is how you can upload your own font files to work with the CLEAN theme.
Updated on: 10/6/21
I'm going to walk you through all the steps to get your custom fonts uploaded and added to your CLEAN website. Before we jump in, here is a quick checklist of what you need prior to jumping in.
- Your actual font files.
- Your child theme is set up and ready to rock
- A can-do attitude. LOL :)
Step 1: Gather All Font File Types
Chances are that you only have font files in one file type. Typically it's a .ttf or .otf file. But you need all three of the following file types to get this working. You need:
- .eot
- .woff
- .ttf
If you have these file types already, I'm super impressed! If not, it's all good. Hop on over to this website to convert what you have to the file types above. https://convertio.co/
or https://anyconv.com/ttf-to-eot-converter/
Step 2: Upload Your Font Files to the File Manager
Now that you've got your font files, go ahead and open up the HubSpot file manager.
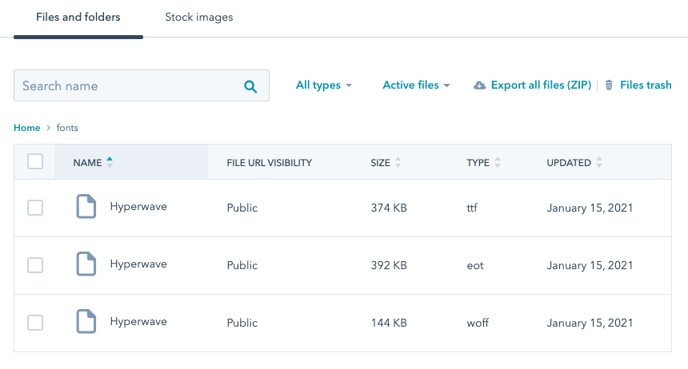
If you're a fan of being organized like I am, go ahead and create a folder named fonts and then upload all your font files directly to it. Mine looks like this.
Keep this window open as you'll need to access it in the next step.
Step 3: Prep Your Child Theme
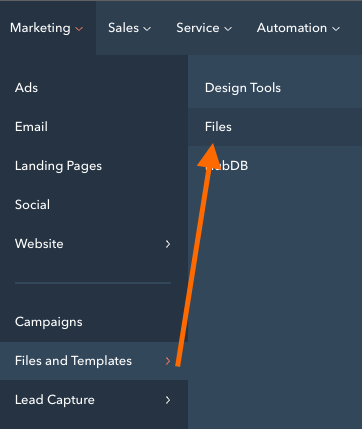
Jump on over to the Design Tools section of HubSpot and click on the child theme that you've set up. If you've recently set this up you'll see the addition of a child.css file. Upon creating the child theme, you did have the option to rename this file. If you did, look for that file instead.
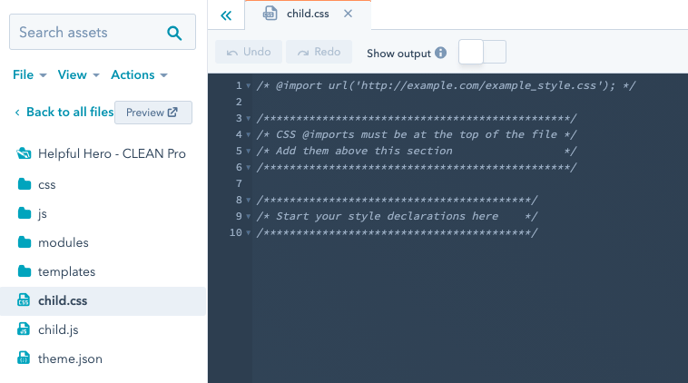
The chances are this file is empty and looks like this.
If you've already added some custom CSS to this file, it's all good.
Copy this snippet of CSS code that's below and paste it into your child.css file. This is going to make your life much easier.
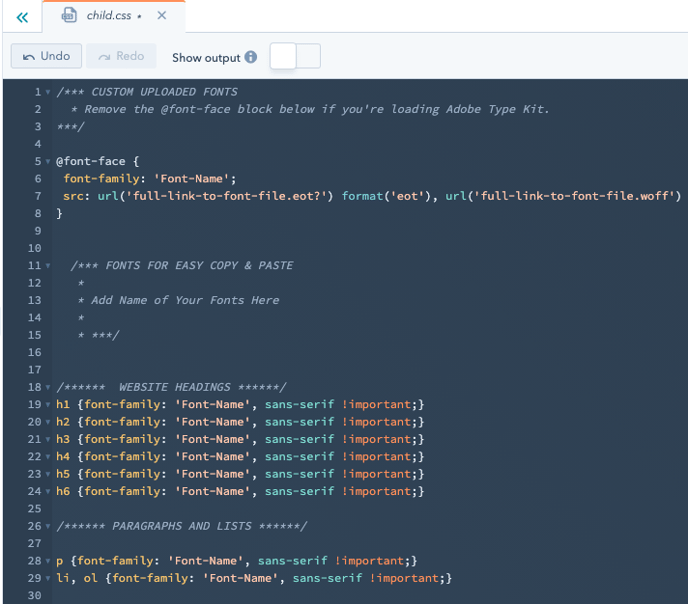
Your child.css file should now look something like this...
Step 4: Create a @font-face for each font
At the top of the CSS file on line number 5, you'll see the @font-face attribute. For each font file that you have, you need to create a @font-face for it.
Let's get this place holder @font-face filled in and then you can simply copy/paste the block as many times as you need.
Jump back to the tab with the File Manager.
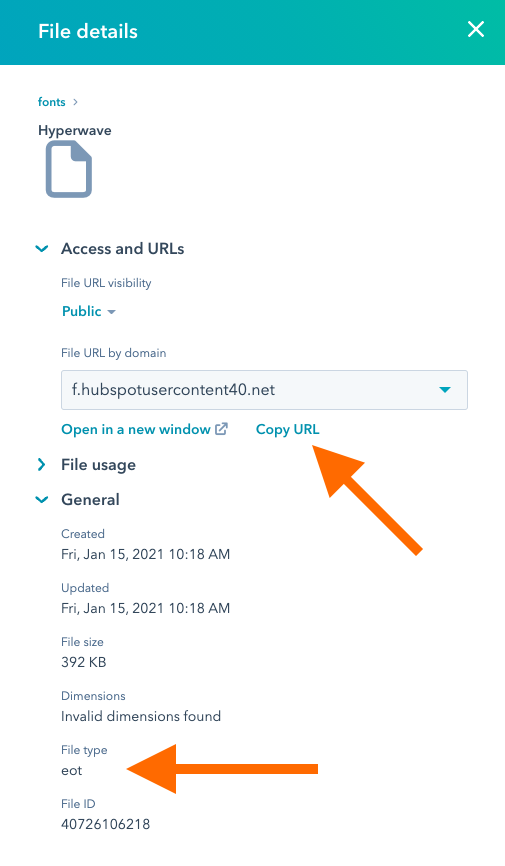
Locate the .eot file type of your custom font and then click copy URL.
Jump back to the child.css file and paste the URL
Highlight the placeholder file name (making sure to leave the ? at the end) and then paste in your file's URL.

Repeat this process for the .woff and .ttf files.
Note: These other file types don't require the "?" at the end so don't worry if you don't see it.
Name your font-family
Go ahead and add in the name of the font-family. You'll need to use and reference this. As an example, mine looks like this.

Rinse and repeat
For each font file that you have, you'll want to copy the entire @font-face block and paste it below in order to add your other fonts or additional font weights. For your various font weights you might name the font-family something like this:
- Hyperwave-Regular
- Hyperwave-Semibold
- Hyperwave-Bold
- Hyperwave-Black
This naming convention is completely up to you so I'd definitely say to keep it straightforward.
Step 5: Attribute Your Font to each Typography Element
I've done my best to make your life super easy and indicate all the different typography elements that you and adjust. As you scroll down the CSS file look for the placeholder called Font-Name which is what you'll replace with the font names you just created.
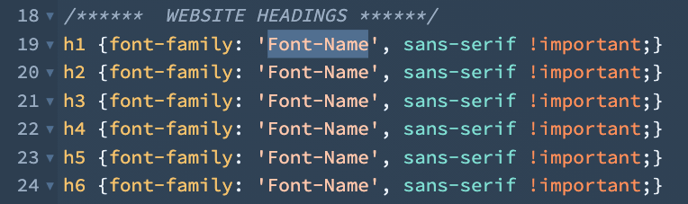
Update where ever you see Font-Name and when you're done simply click the Publish button. That's it! You're done with the hard part.
Step 6: Typography Theme Settings
Now that you have your custom fonts loading on your website you can still access the theme settings via the CMS and adjust the font-size, color, letter spacing, etc. The only thing you won't have access to is the font-weight, AND the actual font name via the dropdowns. That's what you're overriding in the CSS file you just edited.
Note: This font WILL NOT appear in any of the font dropdowns in your theme settings or in various rich text editors.
Boom! You're done. See, that can-do attitude really paid off.