If your website is translated into multiple languages this is how you can modify the system page templates to show the proper language.
Before we jump into this...
It's important for you to know that currently, HubSpot system page templates are HTML files that aren't compatible with their cool drag-n-drop CMS. I wish they were just as much as you probably do.
There are multiple system pages included in CLEAN to cover all your bases. In this article, We're just going to walk you through the process using one of them, but this process can be used for all of them.
This will require editing a little HTML but I believe you can do it.
Step 1: Clone the system page template to your child theme.
Go to the Design Tools section of HubSpot and in the left sidebar open up the PARENT theme files under the @marketplace folder. Look for the templates folder and then the system-pages folder.
In this example, we're going to use the clean-password-prompt.html template. Right-click the file name and select clone to child theme.
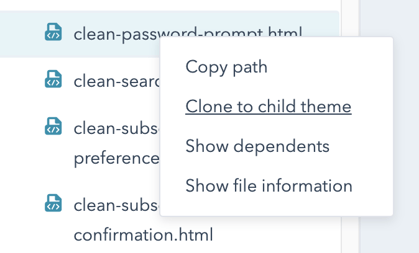
You'll see a modal pop-up asking you to select a child theme. Go ahead and select the one you're currently using.
Step 2: Open up and edit the template to add in new "variables"
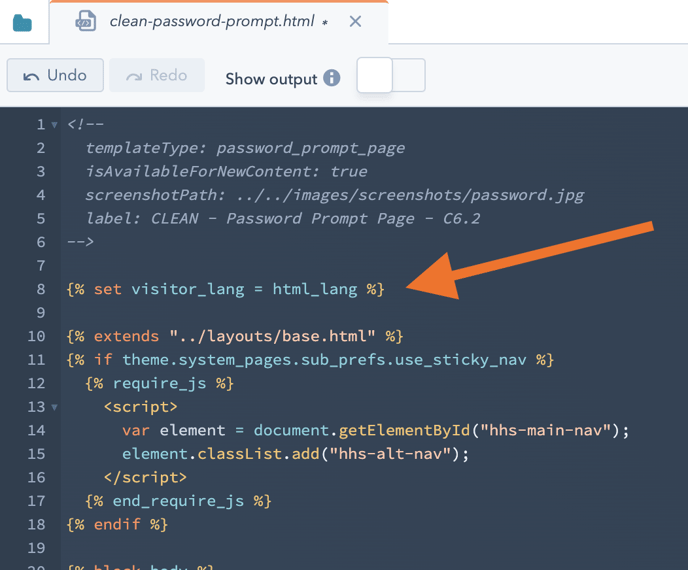
From the Design Tools section, open up your child theme folder and look for the template you just cloned, and open it. You should be looking at something like this.

If so, awesome! Let's press on.
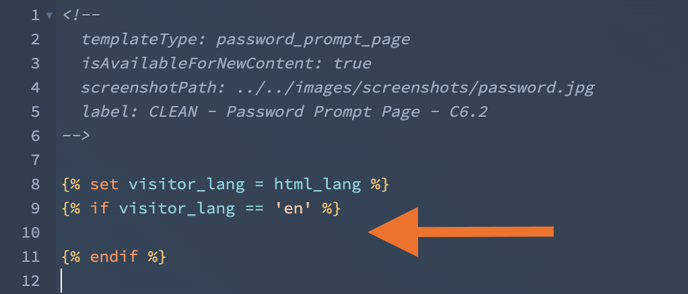
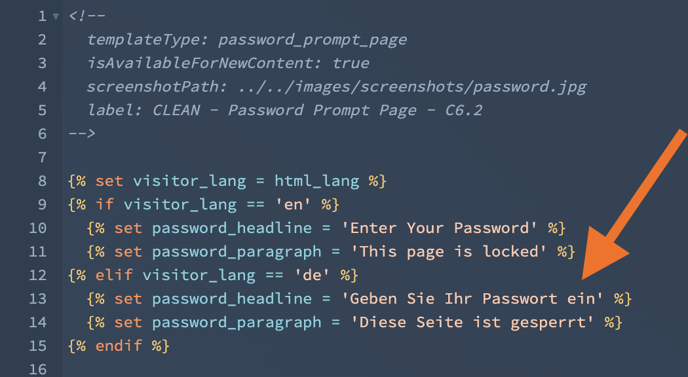
Now we're going to add a little code right under line 6 (the grayed-out comments).
This first snippet of code is going to let us see what language the page visitor wants to use.
Go ahead and copy/paste this line of code into the template.
Like this...
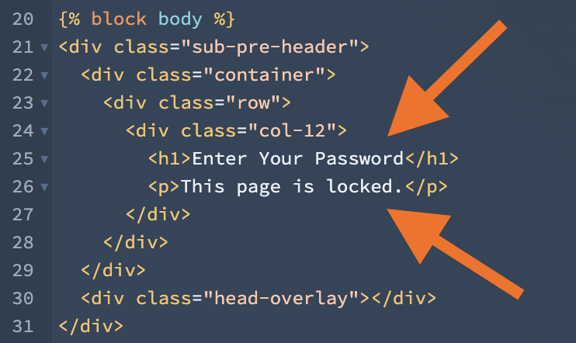
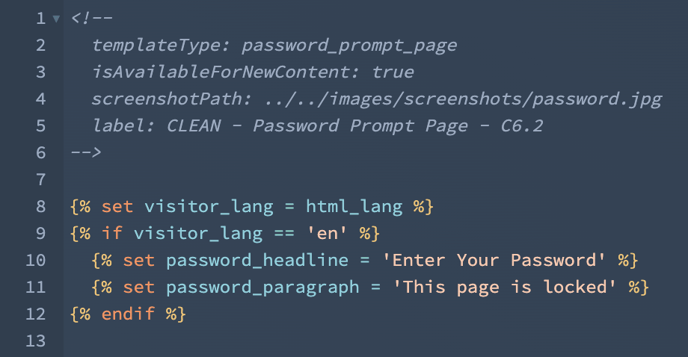
Next, we'll create two different "variables" to replace the "static" (English) text that's in the template.
Forgive the techy lingo here. Basically, a "variable" can vary depending on the logic we wrap around it. It will all become clear in a second. Don't you worry.
We'll be replacing these two lines.
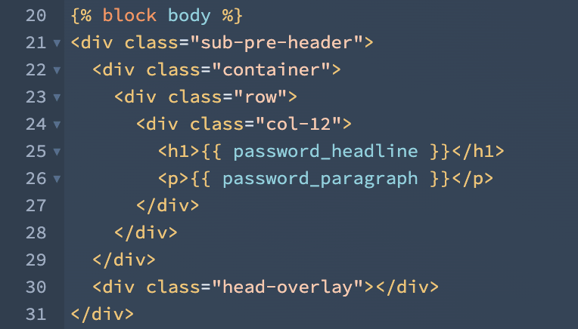
The variable name can really be anything. I just like to make it clear what it's referring to.
For "Enter Your Password" we'll update it with the following:
For "The page is locked" we'll update it with the following:
Go ahead and copy/paste those into place so your file looks like this.
Step 3: Let's make those variables "smart" with some logic
Buckle your seatbelt because here is where things get super cool. By cool I mostly mean nerdy and I LOVE IT. We're going to create some "conditional logic."
Scroll back toward the top of the template file.
We'll start by adding some logic for our primary language. In my case, this is going to be English (en). However, yours could be in any other language.
In order to do this you'll need to know the two-letter abbreviation for the language you have set as your primary along with the other languages you want to use.
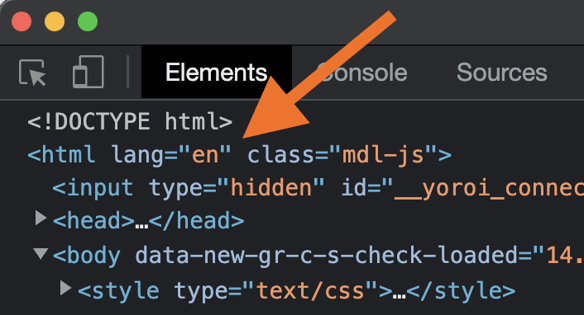
One easy way to do this is by simply going to a page of your website and right-clicking to bring up Chrome's Inspector tool. Scroll to the top of the rendered code and you'll see the language abbreviation.
Here is the first piece of logic we'll need.
(Remember, switch the 'en' to your primary language's abbreviation)
Copy/paste that on line 9, right below where you added the very first snippet of code.
Next, we'll tell it what to do if the visitor's language is set to 'en' (English).
This is where we are going to use the variables we set lower on the page.
Copy/paste these two lines above to line 10 in the template. For bonus-nerd points give those two lines an indent by highlighting them and hitting the Tab key.
You're doing awesome and well on you're way!
Now, let's add a second translation in German.
For this, we are going to create a slight variation of line 9 using what's called an "else if".
Copy that and we're going to place it right after line 11, like this.
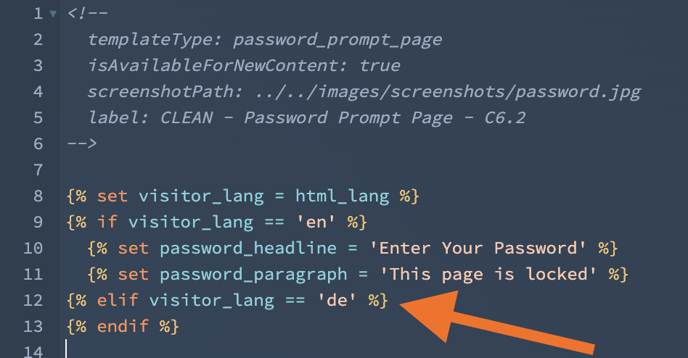
Now, grab the two variable lines we had added to lines 10 and 11 and copy them. Then paste them below line 12 and add the correct translation in the quotes. Like this.
You can repeat this elif pattern for as many languages as you like.
The very last bit of code to add here is mostly a safety precaution. After line 14 you'll want to add this.
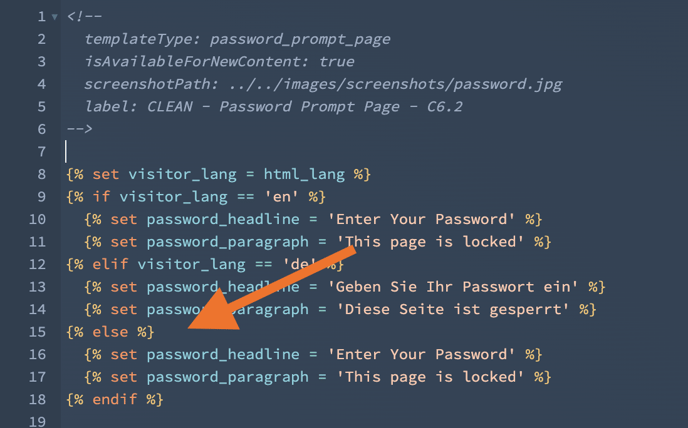
This simply ensures that if the language abbreviation isn't quite correct or you forget to set one, some text will still show up.
Step 4: Set the new and modified template in your Content Settings
Now, that you have this new template all set up, you'll need to go to your Content Settings under Website > Pages > System Pages and select the correct template from your child theme.
That's it! You're done. You deserve a back rub after that one.